

Making gum paste orchid is a fun way to experiment with orchid biology. Orchids are a great source of nitrogen, which is important for growing plants. By growing your orchids in a dry environment with some sunlight, you can supply them with this crucial nutrient.
In the right conditions, your orchids will produce gum paste orchids. The process is simple and easy to do for those who are not very experienced with growing plants. All you need to do is add some water to the container and let it sit for a day and a night until the water comes up.
Then, you simply cut out the bottom of the container and pour in the new liquid content. You can add some roots if you have them though! It takes about a week for them to grow enough growth so that they reach safety height.
Contents:
Roll out the gum paste

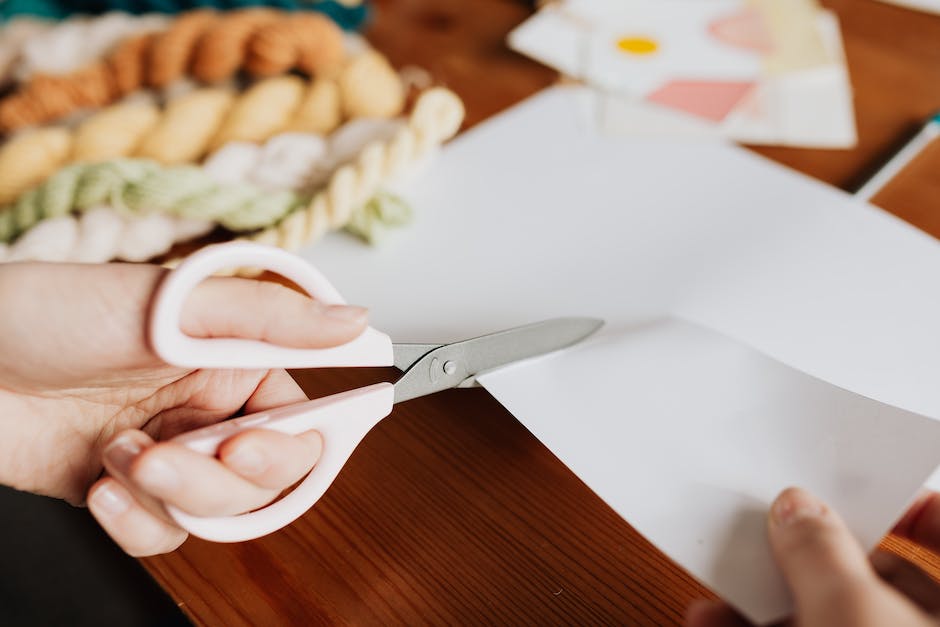
Start by rolling out your dough on a floured surface to a length of about 6 inches. Then, cut along the roll line, leaving a ¼ inch margin around the shape of the orchid.
Roll up the orchid and let sit for five to ten minutes to harden. Then, cut along the line and roll up!
These are beautiful flower decorations that look like they are floating in water! They also smell delicious while baking so don’t worry about eating too much of them while they are cooking.
Use a knife to cut lines in the gum paste
When making orchid gum paste, your lines must be cut very carefully. The closer you cut the lines, the more narrow your orchid will be.
Too wide a line will cause the gum paste to break when heated. This would make it look like a circle of gum with a line of cream in between.
Too tight a line and you may not be able to include all of the orchid parts in your gum paste. This would mean that you would have to purchase separate pieces of cream for the orchids and then mix them together in hot water before applying them to your gum.
Make an outline of the orchid shape

Once your orchid is rooted, you will need to shape it to create the leaf structure. This process is called Crown Shaping. You can do this by taking some live plants and creating a circle of roots with them. You can also take cut-toxic orchid plants and forming a circle of roots around them.
You can also Crown Shape your orchid by taking some cut-toxic orchid plants and forming a circle of roots around them. These plants must be approximately the same size so that it absorbs water and sits on the ground without moving.
You can also Crown Shape your orchid by taking some cut-toxic orchid plants and forming a circle of roots around them. These must be slightly smaller so that it sinks into the ground slightly.
Place lines of paste along the outline
Next, place a line of paste along the outline of the flower. Start at the bottom and work your way up to create a full circle of paste.
Whisk together all of your ingredients until they are mixed well and then add water to achieve your desired thickness.
Use your knife to cut out the paste and then gently patch the cutout with some glue. Let dry before adding another layer of paste and cutting away.
This process may take several days, so do not worry about starting early. You can always start once the weather is warm enough for swimming!
After making some gum paste orchids, try making some orchids with different shapes like arrowheads or pillars.
Smooth out your orchid shape

Once you have your orchid shape, the rest of your shaping is pretty simple. You want to smooth out the sides and bottom of your orchid to make it look more secure.
To do this, place your orchid in a vase and let it dry for a few days. Then, remove the leaves and brush away any excess soil. Now, you can shape the internodes and leaf segments as desired!
How to make very thick gum paste orchids that last forever is to take your time in drying time well. Try leaving your orchids overnight if you are hurriedly drying, they will look nicer that way!
Once they are dry, roll them tightly in newspaper to prevent moisture from escaping and prop up the lid to allow air to get back in.
Let dry for several hours
When the paste is completely dry, you can start creating your orchid. Make sure to write your instructions on the paste so you do not run out of steps!
Brush your orchid with glue to help it stick to the board. Use short, gentle strokes to ensure your orchid does not drop off.
Drill two holes about an inch apart and set them aside. Mix up some glue and brush just enough to cover the two holes. Add another layer of glue and brush just enough to cover the second hole.
Set those aside too, we will use them later!
Now that the orchids are glued down, let them sit for a few hours so they dry completely.
Bake according to instructions
When making gum paste orchid, you want to bake the gum for about eight to ten minutes until it comes together and says, “slip”. This is important!
If you take away the heat during this time, it will come apart and not harden properly. You can still make orrchid, but it will be very soft and stretchy!
Make sure to check your gum paste orchid once it starts to set up. If it comes apart, take it out and keep baking until it becomes set. That is what will make it soft enough to wear as a ring.
This recipe can be made twice due to the demand! Make sure to keep a supply of this gum paste on hand for anyone who wants a new piece of jewelry.
Finish your orchid with flowers and leaves

When your orchid is all set, you can add some flowers and/or plants. Orchidists often create a lidded pot with some sand and water, and place their orchids inside. You can also join together two or more types of orchid to create a new plant.
One of the most popular ways to make art with orchids is to paint them with nail polish and then carefully wipe away the paint as it drys. Other artists use pencils to draw on the leaves and then paint them away. Both methods work!
In addition to painting the orchid, you can invests in buying some seeds from a reputable source that grow well in your environment. Some breed very well together and produce beautiful plants.